This tutorial walks you through how to generate an Estimate, including
Parts, Labor and Jobs, Customer approval, and Invoicing.
The following information will be used in the tutorial.
1. Start a New Estimate |
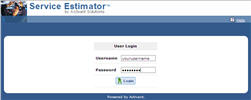
Log-in
to Service Estimator. |
Click images to see a larger view.
|
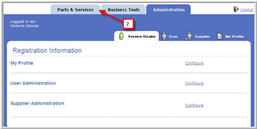
Navigate
to Parts and Service Tab. |
|
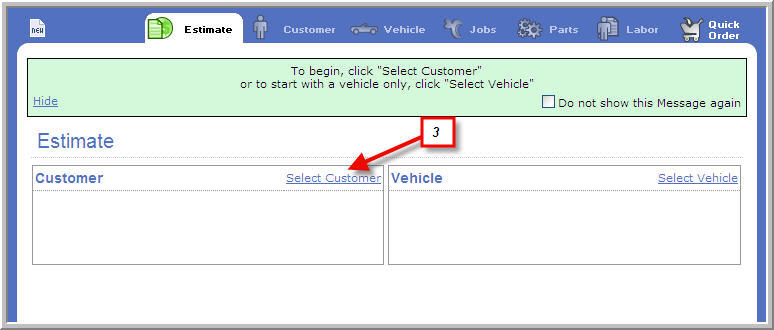
Click on
Select Customer. |
|
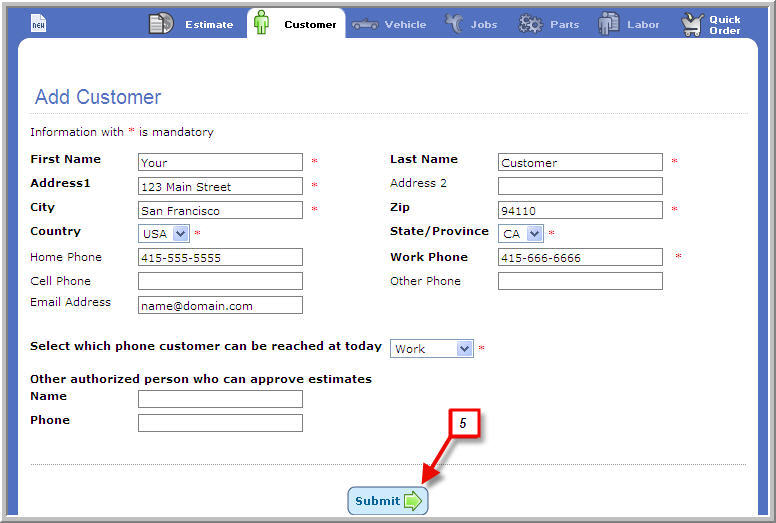
Select
Add a New Customer. |

|
Enter Customer
Information and Submit. |
|
|
 Enter as much Customer Information as possible for future
contact needs and follow-up. Enter as much Customer Information as possible for future
contact needs and follow-up.
|
2. Select Vehicle
Now that the customer is entered and selected, a vehicle for the Estimate
is selected. |
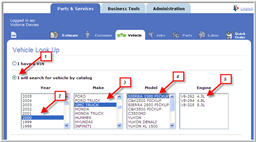
Select
I will search Vehicle by catalog. |
Click
images to see a larger view.
|
Select
2000 in
the Year column. |
Select
GMC Truck in the Make section. |
Select
Sierra 1500 PICKUP in the Model column. |
Select
V-8 4.8L in the Engine column. |
|
 In addition to identifying the vehicle type by make and
model number, the vehicle VIN can be used to locate the vehicle type in
the database. If
the vehicle requiring service is not in the vehicle catalog, select I could not find vehicle in catalog to
manually enter the vehicle information. In addition to identifying the vehicle type by make and
model number, the vehicle VIN can be used to locate the vehicle type in
the database. If
the vehicle requiring service is not in the vehicle catalog, select I could not find vehicle in catalog to
manually enter the vehicle information.
|
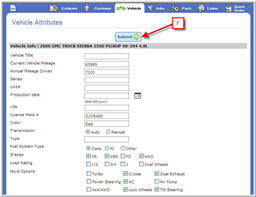
Add optional
Attributes and click Submit. This
vehicle information is now saved to the customer's profile.
|
|
|
Multiple vehicles can be saved to a single customer profile. |
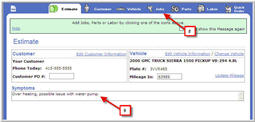
Enter any
vehicle symptoms or customer concerns in
Symptoms field. |
|
Navigate
to Jobs tab. |
|
It is recommended to always maintain up-to-date mileage
information for future service reminders. |
3. Add Jobs
Jobs provides a way to look up both parts and
labor together by searching for the type of repair being done. For
example, selecting the job “Water Pump”, will display both the Water Pump
and related parts as well as the labor time to replace the water pump.
Parts and Labor are vehicle-specific.
You must
have selected a vehicle to proceed. |
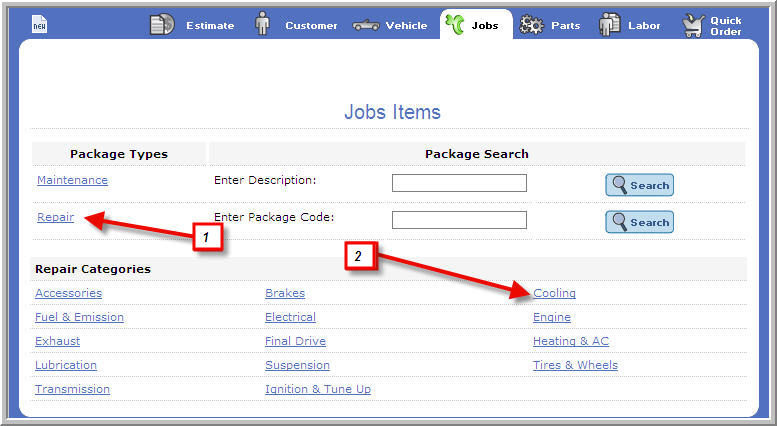
On Jobs
page, click on Repair. |
Click
images to see a larger view.
|
Select
cooling. |
Scroll
down results to select Water Pump. |
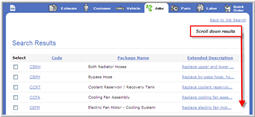
|
Click Search. |
Select
Specific
Conditions. |
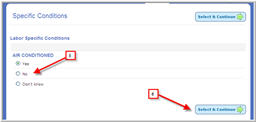
|
Click on
Select & Continue button. |
|
Specific conditions depend on the manufacturer product
lines being viewed. Specific
conditions may or may not be presented for
other vehicles selected. |
From the
Search Results, select the parts required. |

|
|
Multiple parts may be required
-- if they are not listed in the results, they can be added later. |
|
Selecting parts will not automatically
order them -- if you have some of the
required
parts in stock, you can delete them from the order once the Estimate has
been accepted by your customer. |
Scroll
down the page and add Related parts if applicable. |
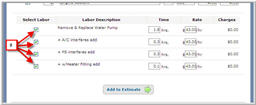
|
Select
Labor items. |
|
|
If you have additional labor items to add to the Estimate,
you will be able to do that using the Labor tab. |
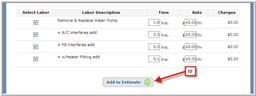
Click Add
to Estimate.
|
|
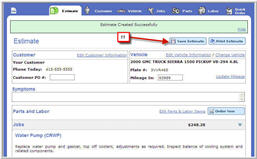
To save
all the information entered on your Estimate, click on Save Estimate. |
|
|
 Navigating away from the Estimate without saving will
lose the Job information entered so far. Customer
and Vehicle information will remain intact but any information entered
or selected specific to the Job will be discarded. Navigating away from the Estimate without saving will
lose the Job information entered so far. Customer
and Vehicle information will remain intact but any information entered
or selected specific to the Job will be discarded.
|
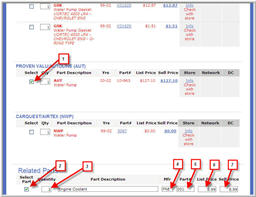
4. Select Parts and Labor Items
To provide a complete Estimate, select the
parts and labor applicable to the Estimate. |
Select
Water Pump parts. |
Click
images to see a larger view.
|
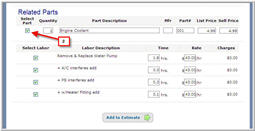
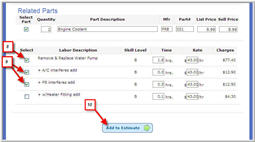
In the
Related Parts section, select water coolant. |
Enter 2
Gallons of Coolant. |
Enter (Mfr
Code) “PRE”. |
Enter Part
Number “001”. |
Enter List
Price “8.99”. |
Enter Sell
Price “8.99”. |
Select
Remove and Replace Water Pump. |
|
Select
the relevant add-ons:
+A/C interferes
add +PS interferes
add.
|
Click Add
to Estimate. |
|
Different add-ons are presented according to the vehicle
type selected at the beginning of the Estimate process. |
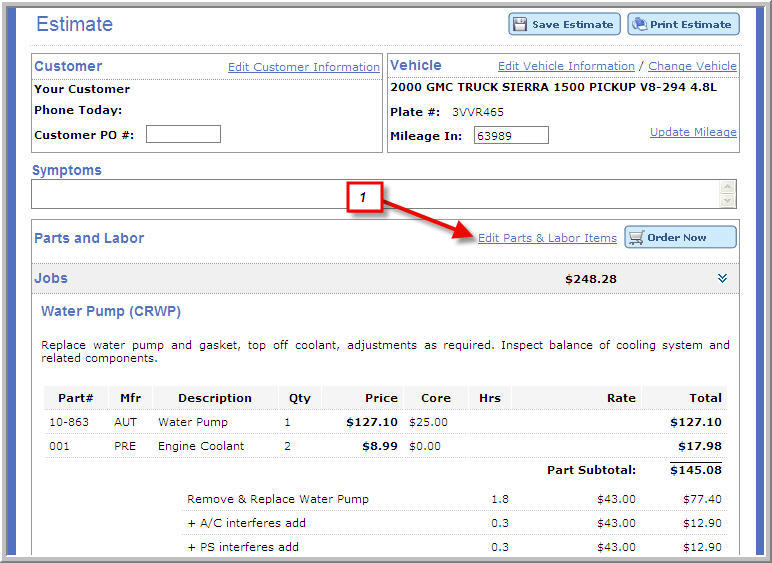
5. Edit Estimate
The Estimate is now ready based on the standard
items selected. In
some cases, additional fees might apply to the Job, this section shows
how to do that. |
Click on
Edit Parts and Labor Items. |
Click
images to see a larger view.
|
Enter 4.00
in Shop Supplies. |
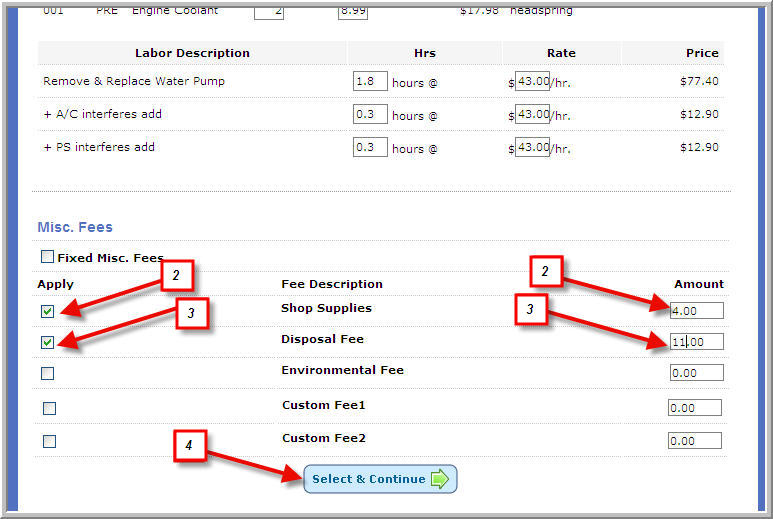
|
Select
Disposal Fees and enter 11.00 into Amount Field. |
Click Select
and Continue. |
Click on
Save Estimate on the next page. |
|
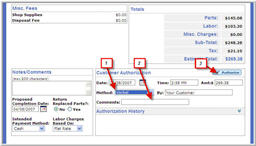
6. Review Estimate with Customer & Authorize
The Estimate is now ready for presentation to the customer. In
order to convert the Estimate to an Invoice, customer authorization for
the Estimate must be recorded.
Activant Service Estimator
will auto-populate the date and time to present date and time for Authorizations.
You can
edit these fields if necessary. |
Select
method of authorization from drop down menu. |
Click
images to see a larger view.
|
Add comments
if necessary. |
Click on
Authorize button. |
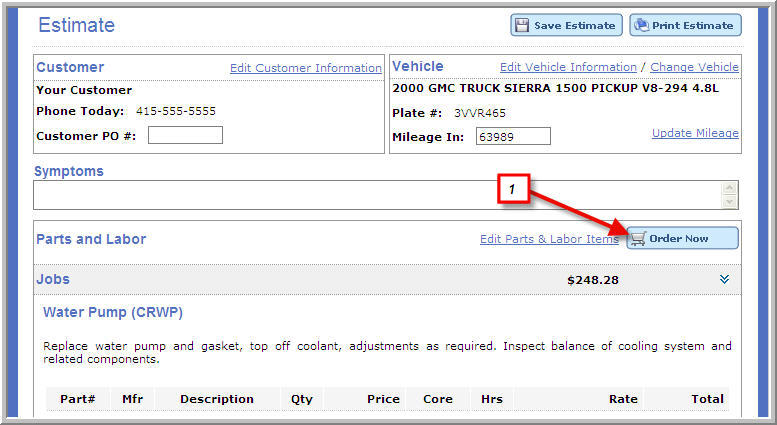
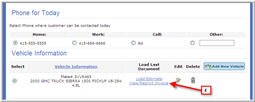
7. Order Parts
Once an Estimate is approved, the parts required for the job can be
ordered. |
From the
Estimate page, click on Order Now button. |
Click
images to see a larger view.
|
Review
the Part Order Summary. |

|
Enter a
note (if needed) and select delivery method. |
Click Submit. |
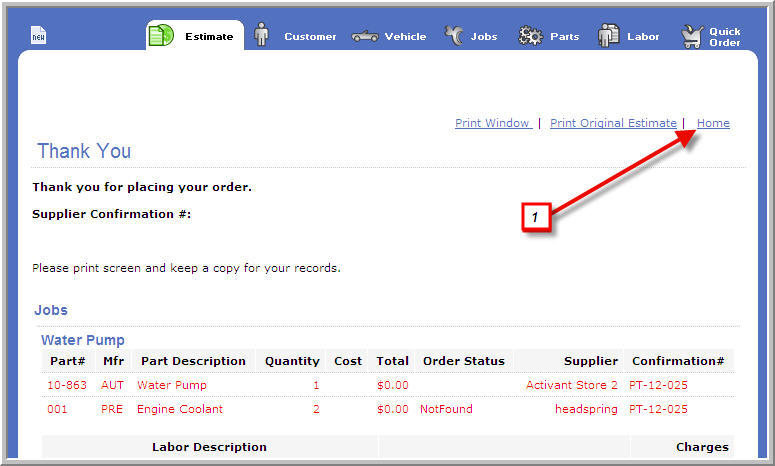
An Order
Confirmation including a Supplier Confirmation and a Gateway Confirmation
that indicates the Supplier received the order will be returned.
|

|
|
This order confirmation will also be sent via email to
the email address in the Service Estimator profile. |
8. Convert Estimate to Invoice
Once the Job has been done, an Invoice for the work is created for presentation
to the Customer for payment. |
From the
Order Confirmation, click on Home. |
Click
images to see a larger view.
|
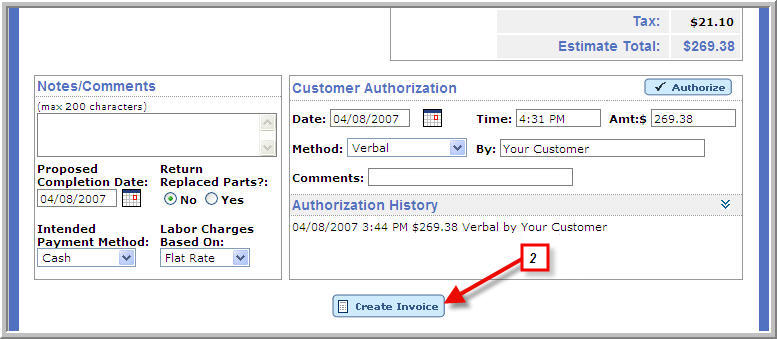
Scroll
down the page and click the Create Invoice button. |
|
|
The Estimate must be authorized in order to create an
Invoice. |
9. Print Invoice |
To make
a print of the Invoice for presentation to the customer, click on Print
Invoice. |
Click
images to see a larger view.

|
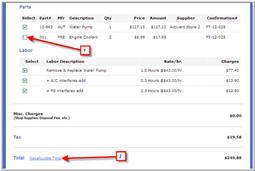
10. Adjust Invoice
On occasion, a part or labor item originally included on the Estimate
was not used and must be removed from the Invoice. |
Uncheck
item from Invoice. |
Click
images to see a larger view.
|
Click on
Recalculate Total for the updated Invoice amount. |
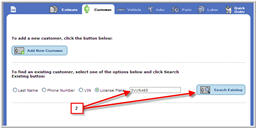
11. Recall Invoice
If the Invoice is no longer on screen, it must be recalled to access
it. |
Navigate
to Parts & Service. |
Click
images to see a larger view.

|
Click on
Select Customer. |

|
Enter search
information and click Search Existing. |
|
Select
View/Reprint Invoice. |
|
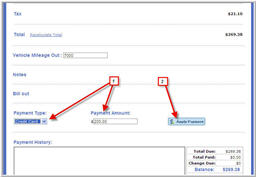
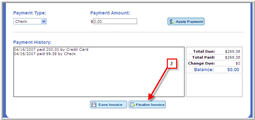
12. Accept Payment & Finalize Invoice |
To record
customer payment, select payment type from drop-down menu. |
Click
images to see a larger view.
|
Payments
can be applied via a single payment type or apply multiple payments using
different payment types. The
Activant Service Estimator will calculate the balance remaining if multiple
payments are entered. |
|
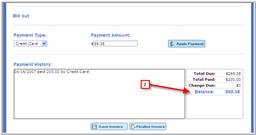
Once the
balance is paid in full, the Invoice must be finalized. By
finalizing the Invoice, it will show up as a completed job in the reporting
system. Click
on Finalize Invoice button. |
|
|
This concludes the Activant Service Estimator tutorial. If
you have additional questions, please see the Frequently
Asked Questions section. |